4 Understanding the Thredd Protect Display
This topic describes the main Thredd Protect screen and explains how to use the toolbar, menu options and dashboard.
Different levels of user access can be configured on the Thredd Protect portal, depending on role. For example, some users may only be able to view information about transactions while others can view transactions, edit rules and run reports. Therefore, if you cannot see a menu option, this may be because you do not have the appropriate permissions. For more information, see User Access Management.
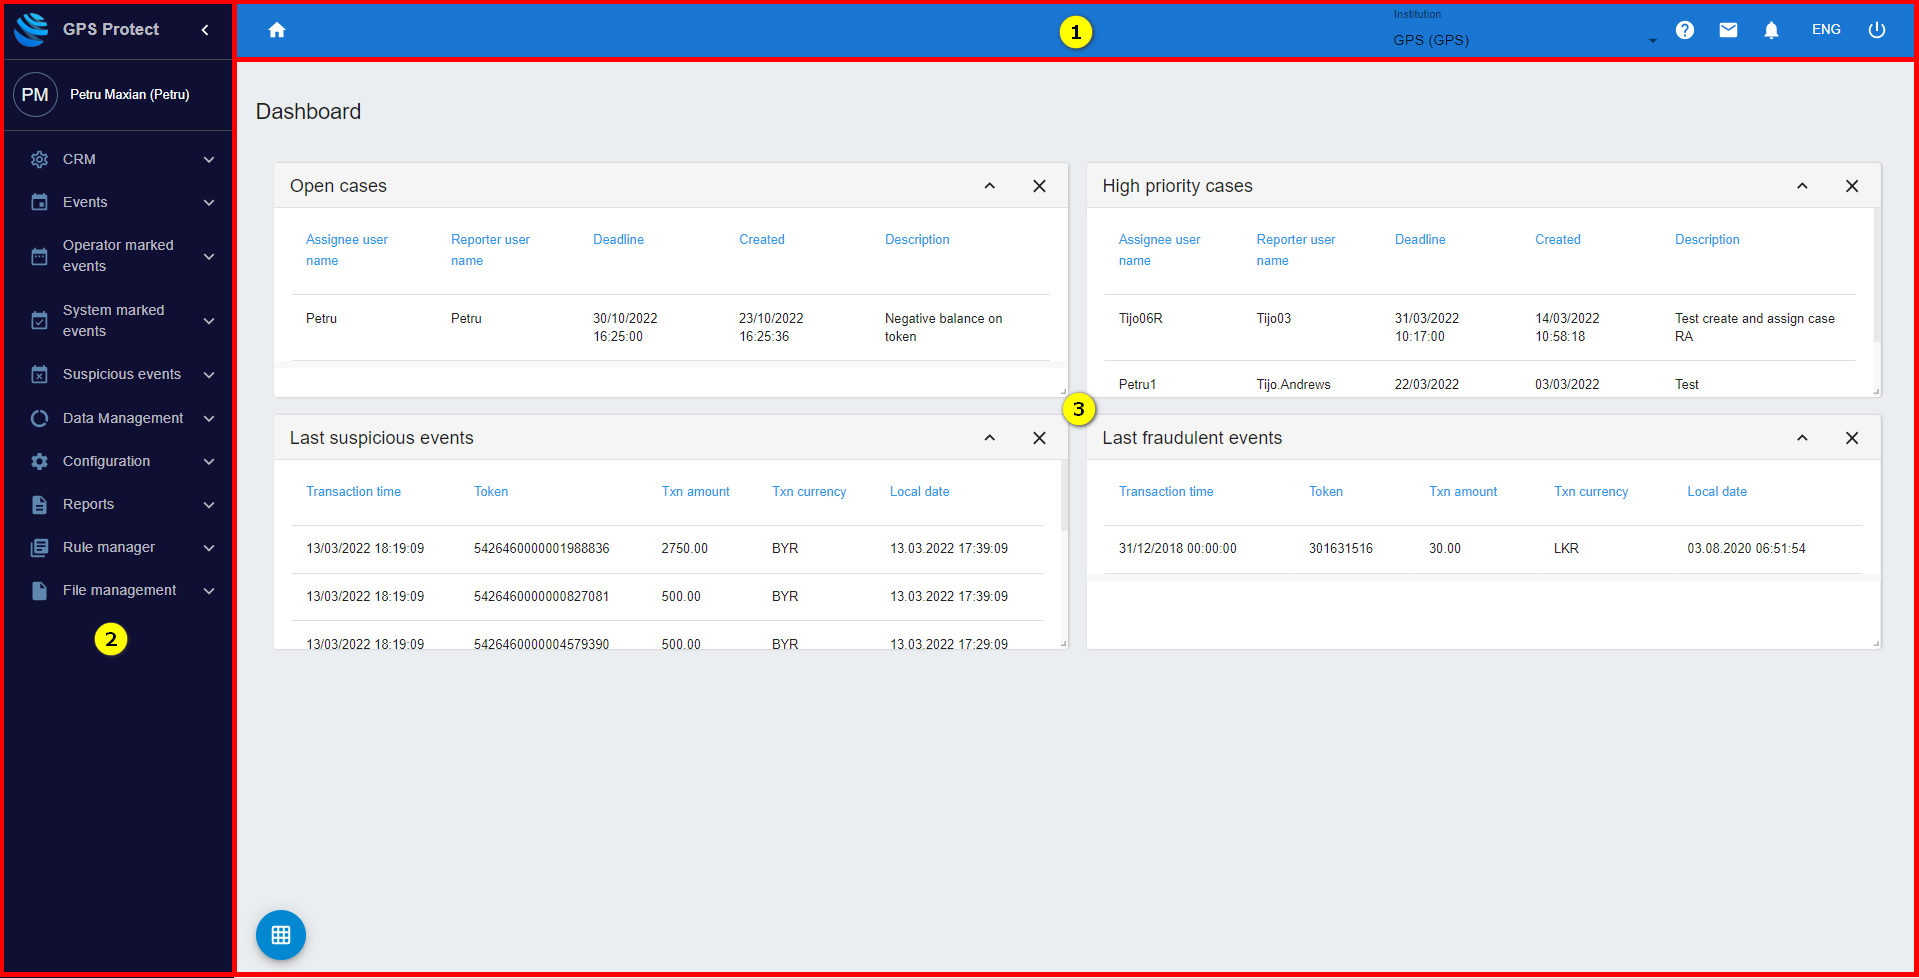
Figure 3: The main Thredd Protect screen
The main interface is divided into three main sections:
|
Key |
Command |
Description |
|---|---|---|
|
|
Toolbar |
Use the toolbar to navigate quickly to key functions, access help, or sign out. See below for more information. |
|
|
Menus |
Use the menus to display user profile details, change the appearance of the screen and access key Thredd Protect functions and displays. See below for more information. |
|
|
Dashboard |
The dashboard displays various widgets (the elements that appear on screen) showing tables, statistical graphs, cases, events etc. You can tailor your dashboard by choosing the widgets you want to display. See below for more information. |


4.1 About the Toolbar
The Toolbar contains several icons you can use to access key screens:
|
Icon |
Command |
Description |
|---|---|---|
|
|
Home |
Click Home in the top-left of the toolbar to return to the dashboard home screen. |
|
|
Institution |
Click on the institution name to select the default institution |
|
|
Help |
Click Help in the top-right of the screen to open the Help interface. |
|
|
Assigned cases |
Click Assigned cases to show all the cases currently under investigation. |
|
|
Notifications |
Click Notifications to open the System marked Transactions screen to see the latest alerts. |
|
|
Language |
Click Language to choose from a list of available languages for the interface. |
|
|
Sign Out |
Click Sign Out to exit from Thredd Protect. |


Hover your mouse over an icon to view its name.
4.2 About the Menus
The main menu bar on the left-hand-side of the screen enables you to:
-
Access your user profile details
-
Change the appearance of the display
-
Access key Thredd Protect functions and screens
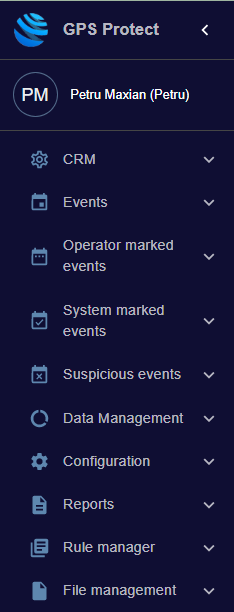
The available menu options are described in more detail below.
4.2.1 About the menu options
On the lower part of the menu bar, you can see all the menu options available to you.
The menu options available to you depend on your role and permissions. If you cannot see a menu option, this may be because you do not have the appropriate permissions. For more information, see User Access Management. If you believe you are missing a menu option or do not have the correct level of access, contact the person responsible for Thredd Protect access within your organisation.
See later in this guide for a detailed description of each of the menu options.
4.2.2 Viewing your User Profile
Your user name and initials are shown in the top of the Menu bar.
To view your user profile details, click on your username. The Profile screen appears:
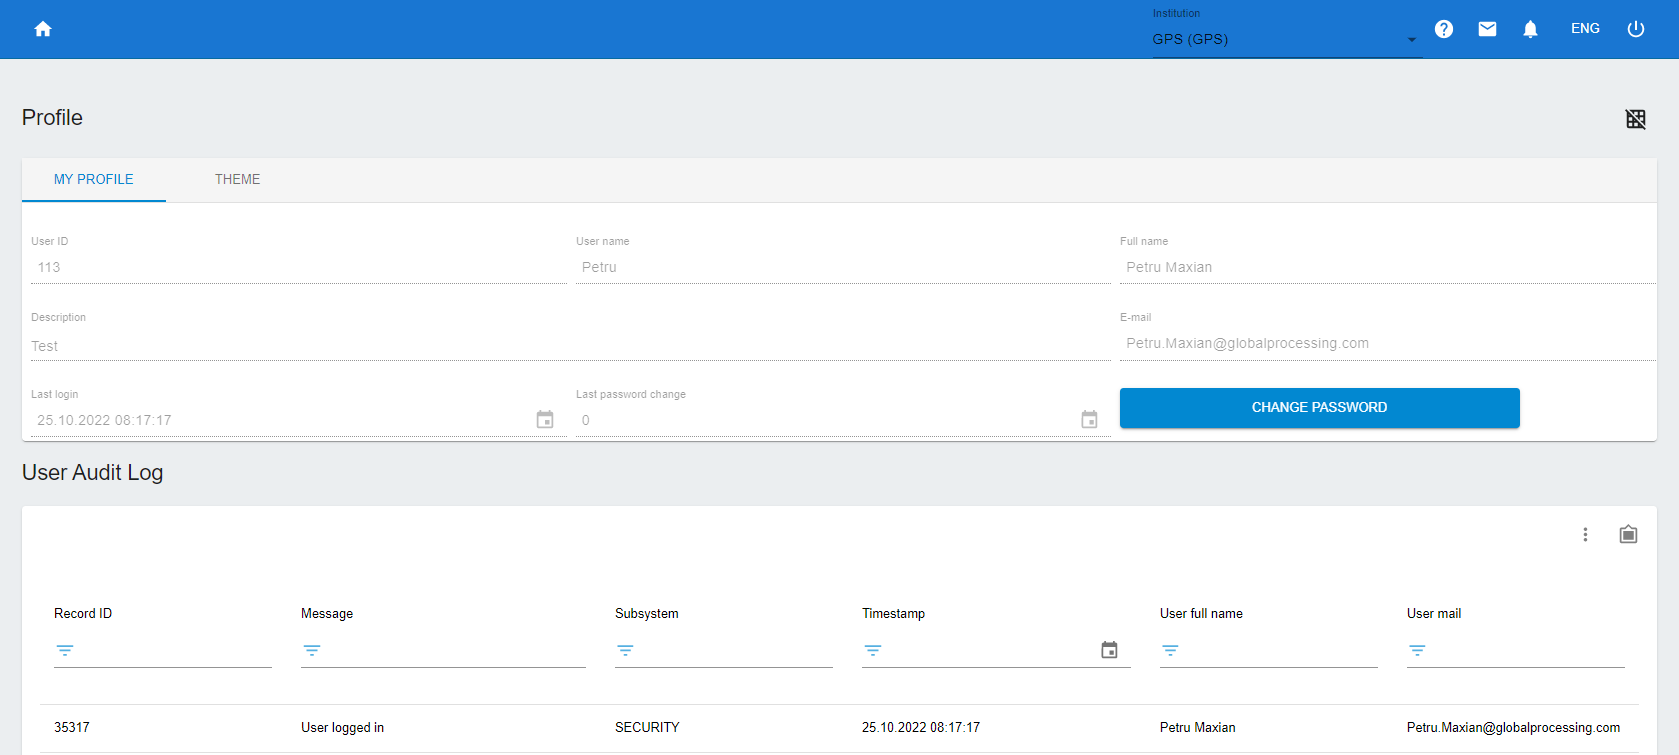
Figure 4: The Thredd Protect User Profile screen
This screen has two tabs: MY PROFILE (used to view your user details) and THEME (used to change the appearance of the screen). These tabs are described below.
MY PROFILE — use this tab to display details related to your profile, such as:
-
User ID
-
Username
-
Full name
-
Description (Institution name)
-
E-mail (registered email address for the user account)
-
Last login (shows the date and time when you last logged into the system)
-
Last password change (shows the date and time when you last changed your password)
Also, on the User Audit Log, you can see all the logs for any user-related actions such as login times, actions performed while using the system, logout times etc.
Changing or resetting a password
To change your password, click Change password. When prompted, enter your current password, your new password twice, and then click Save password.
If you are not currently logged into your Thredd Protect account and need to reset your password, use the Thredd customer support portal to raise a customer support request, or via email by sending a password reset request to FraudTeam@thredd.com.
4.2.3 Changing the display
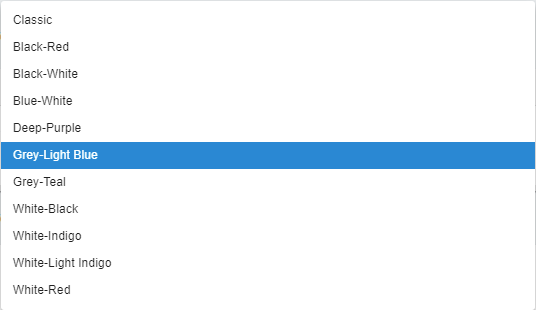
Use the THEME tab to change the appearance of the screen, as shown below:

Figure 5: The Theme tab for changing the appearance of the display
Changing the colour scheme
To change the colour scheme of the display, click on the down arrow  next to Theme and choose your preferred option from the dropdown menu:
Changing the size and scale
To change the font size/scale/zoom level of the display, click on the down arrow next to Mode and choose the preferred option from the dropdown menu:

4.3 About the Dashboard
The Dashboard consists of UI components known as ‘widgets’ which you can choose to display or hide, depending on your requirements. For example, you may want to show the Open cases widget to see all open unresolved cases.
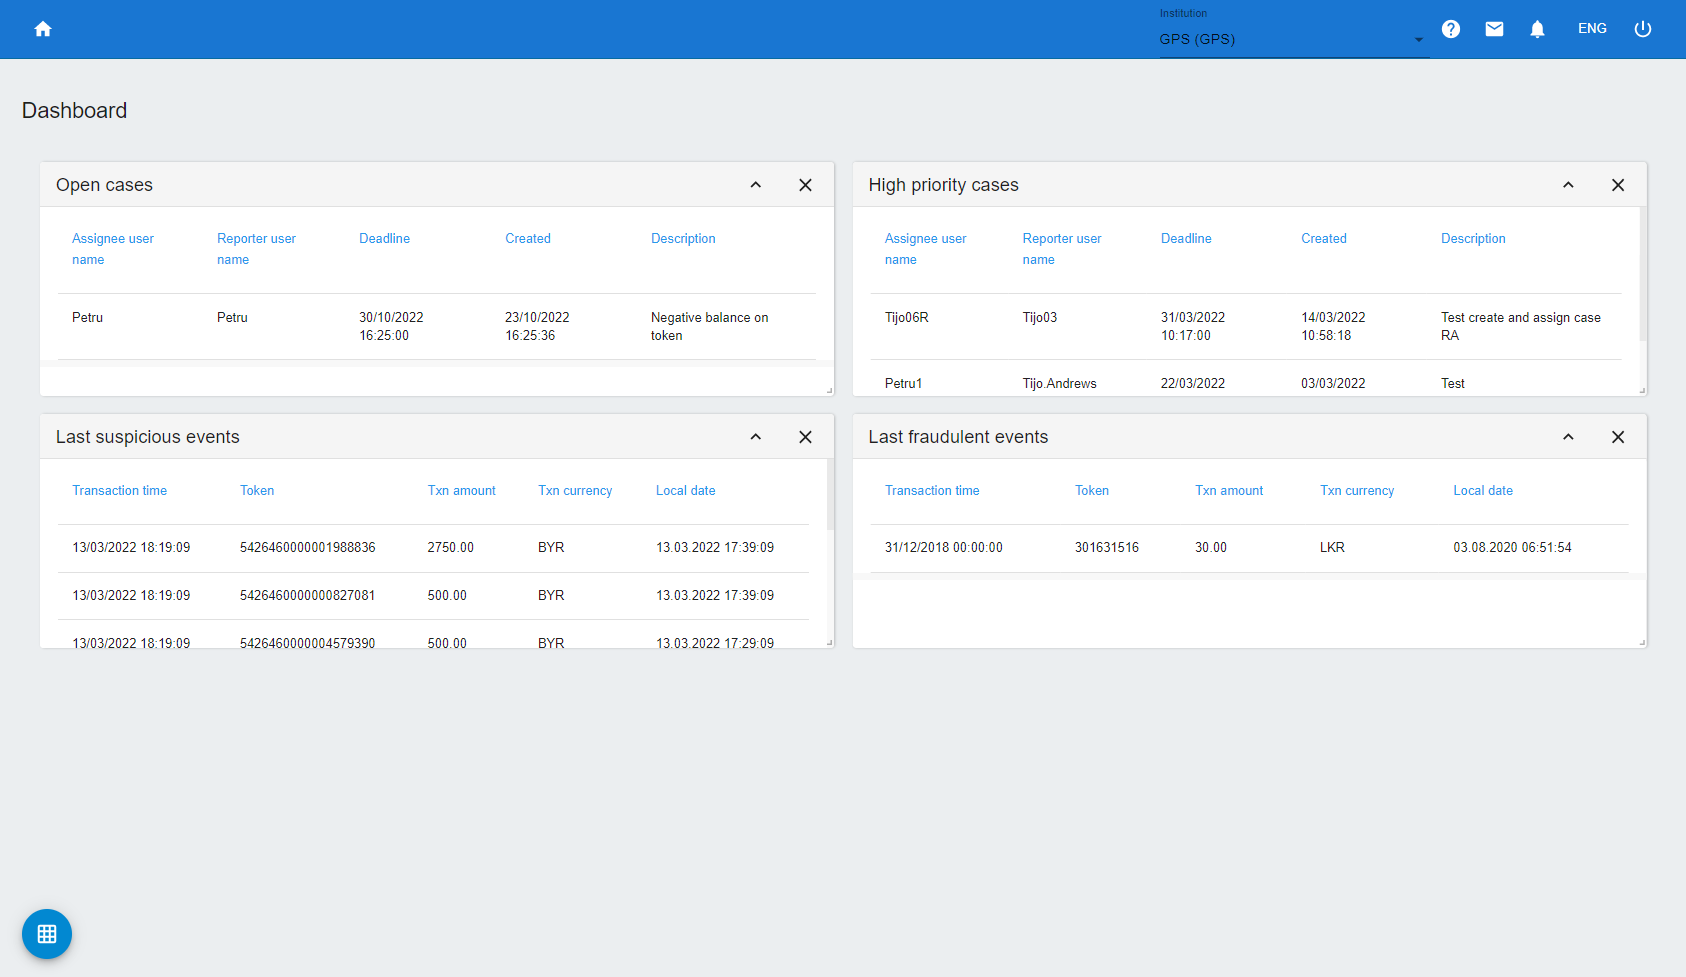
Figure 6: A typical dashboard display
-
Open cases – shows high-priority investigation cases assigned to a user.
-
High priority cases – shows all open unresolved cases.
-
Last suspicious events – shows a list of the last events marked as suspicious.
-
Last fraudulent events – shows a list of the last events marked as fraudulent.
4.3.1 Managing widgets
You can manage widgets using Add grid  in the lower left corner of the Dashboard page. When clicked, the following context-sensitive buttons appear:

The following explains the context-sensitive buttons, clockwise:
|
Icon |
Command |
Description |
|---|---|---|
|
|
Edit grid |
Move and resize widgets. Click Edit grid to turn it red, indicating widget navigation is on. You can now move widgets to the desired location on the Dashboard and resize them. When done, click the Edit grid icon to turn it grey, indicating widget navigation is off and widget cannot be relocated or resized. |
|
|
Expand or collapse all |
Expand or collapse widget. Click the icon to turn it red. In this state, you can collapse all the visible widgets on the Dashboard. Click it again to turn it grey, allowing you to expand all the visible widgets. |
|
|
Show or hide a grid item |
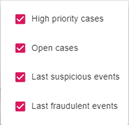
Display or hide widgets on the Dashboard. Click the icon to show all the widget options that can be displayed. Select the ones you want to display; uncheck the ones you want to hide. For example:
|
|
|
Reset |
Restore all the widgets to their original/default position and size on the Dashboard. |