Reviewing Fee Invoice Items
This section describes how to review fees from invoice line items in the Fee Explorer page. Reviewing fees involves checking the invoice items and performing the following actions:
-
Accepting fees which you consider to be legitimate in to Automated Back Office. See the following note on auto-acceptance.
-
Investigating fees that have issues (for example fees that are suspiciously high).
-
Portioning fees between your organisation and a card program. You use this option if you are a BIN Sponsor and want to split the fees with your card programs or affiliates.
-
Recalculating fees using the Recompute option.
To enable you to select fees, the Fee Explorer interface allows you to use the search filters and the data boxes. You can also use the Services or Events view to drill down to the invoice items.
Thredd can configure auto-acceptance which allows fees in the New Status from previous uploads to be automatically accepted in to Automated Back Office. Configuring auto-acceptance allows you to focus on the fees that require investigation or have warnings.
Alternatively, you can disable auto-acceptance, for example, if you are a new user that is uploading invoice cycles for the first time. Disabling auto-acceptance is also useful if you are new to a Card Scheme. For configuring auto-acceptance, contact a Thredd Account Manager.
The activities that you can perform for reviewing fees depend on your Automated Back Office role. For more details, see Roles in Automated Back Office.
Opening the Fee Explorer Page
To open the Fee Explorer page:
-
Click the Network Fees Quick Actions button from the Automated Back Office dashboard. Or, click the
 button on the left-hand side to bring up the menu, followed by Finance > Network Fees. The Network Fees screen appears.
-
Click Fee Explorer. The Fee Explorer page appears.
Selecting Fees
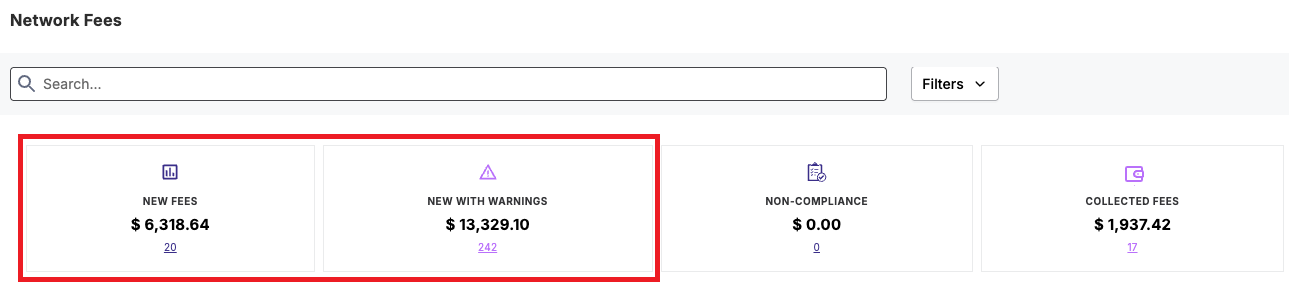
Before reviewing fees, you first need to select the fees from the data boxes or from the search filters. These include fees that are grouped as:
-
New Fees If the fee is in this category, it is legitimate and does not have any issues. In most cases, you can accept these fees. However, you can perform a recalculation, if the Card Scheme has introduced new fee configurations. For more details, see Accepting Fees and Recomputing Fees.
-
New with Warnings If the fee is in this category, it can be accepted. However, you can perform a recalculation if there are any missing configurations. You can also investigate fees in this category for any issues. For more details, see Accepting Fees, Investigating Fees, and Recomputing Fees.
The following image shows an example:
-
To select fees in the data boxes:
-
For fees in the New category, click on the hyperlink under the New Fees data box.
-
For fees in the New Fees with Warnings category, click on the hyperlink under the New with Warnings data box.
-
-
For using the search filter, select the New option from the Status filter (see Filtering Invoice Items).
For more details on the data boxes, see the Viewing Fee Summary Information section.
Drilling Down to the Invoice Details
You can drill down in to invoice line items in Fee Explorer through either the Services or Events view.
Using the Services View
The Services view provides details of invoice items according to the fee level or fee category of the Card Scheme.
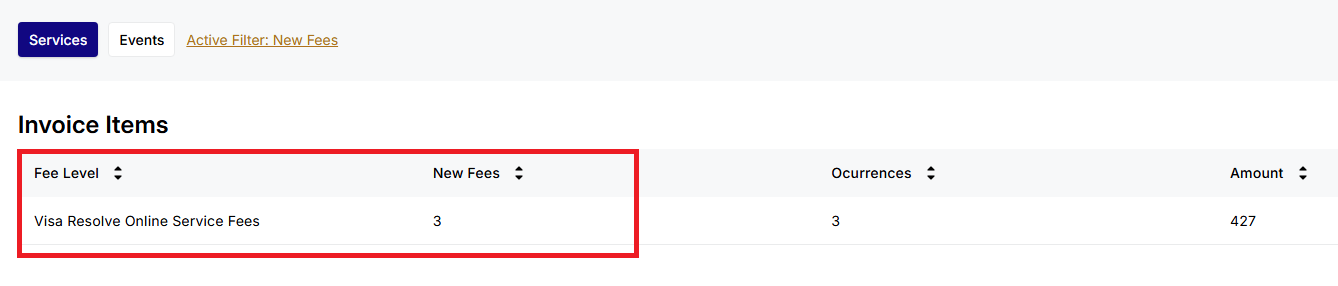
- From the Service view, identify a Feel Level entry where there is a value under New Fees. The following shows an example.
- Click the arrow
 button in the Events column from the Invoice Items list.
 - Click the arrow button in the Details column from the Invoice Items list. Invoice billing line items appear as shown in the following example.

Using the Events View
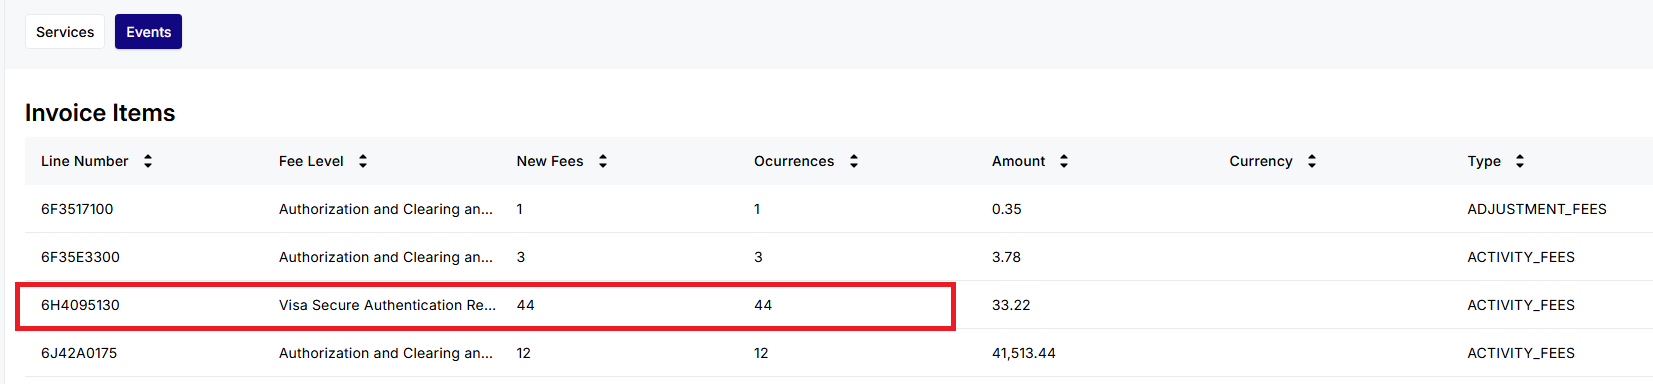
The Events view shows details according to the line number where an event in a particular fee level (or category) was triggered.
-
Identify a Line Number entry where there is a value under the New Fees coolumn. The following shows an example where there are 44 New Fees items for line number 6H4095130.
-
Click the arrow
button in the Details column from the Invoice Items list. Invoice billing line items appear.
For more information on the individual events, see Appendix 2: Event Details.
Accepting Fees
When you have selected fees, you can accept these in to Automated Back Office. If you make an error, the Reopen function allows you to change the status of the fee from the Accepted to the Reopened status, and then you can update the status as required. To find a fee in the Accepted status, you need to use the search filters.
If you accept a fee in the New Fees and the New Fees with Warnings category, the Accept action does not move a fee out of its category in the data box. The count in the data boxes for those categories remains the same.
Updating a Fee Status to Accepted
To update a fee status from New to Accepted:
-
Identify a line item entry with the New Status in the Services view or Events view.
-
Select the line item entry.
-
Click Accept.

The fee no longer appears in the table and is under the Accepted status. You can find the fee item by selecting the Status option in the filter, but not setting a specific status. For more details, see Filtering Invoice Items.
-
If you have accepted a fee in error, filter the records by status by selecting Accepted from the Status:All drop down list.
-
From the invoice line item, click Reopen.

-
Select the invoice item and perform any of the other action steps (see Investigating Fees or Recomputing Fees as examples).
Investigating Fees
For a fee that requires investigation, you can change the status from New to Investigate. When in the Investigate status, you can perform further actions depending on the type of issue. For example, you can use the Escalate option for a penalty fee that you are disputing. Setting an action also changes the status of the fee.
|
Investigate Action |
Description |
Further Actions |
|---|---|---|
|
Escalate |
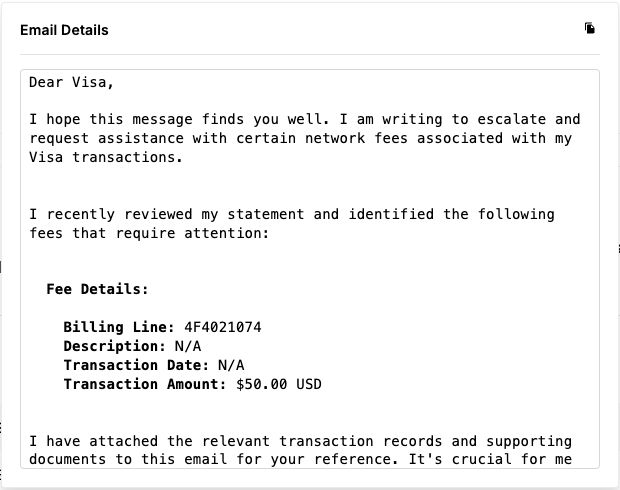
The fee can be escalated where you can inform the Card Scheme of an issue. The system prepares an email template with details, which you can copy and send to the Card Scheme. |
Reopen |
|
Flag a Fee as Suspicious |
The fee has charge information that you do not recognise. You can then escalate by informing the Card Scheme through an email. If you have set the Flag a Fee as Suspicious action in error, you can accept the fee again. |
Escalate, Accept (Error Condition) |
|
Optional |
The fee is optional where incurring it is not mandatory. You can then escalate by informing the Card Scheme through an email. If you have flagged the fee in error, you can accept it again. |
Escalate, Accept (Error Condition) |
|
Flag as Penalty |
The fee is a penalty charge that needs to be addressed. If the penalty should not exist, you can request a waiver, where the status changes to Waiver Requested. When the waiver has been accepted, you can then mark the fee as Waived. You can also escalate by informing the Card Scheme through an email. If you have flagged the fee in error, you can Reopen the fee. |
Waiver Requested, Waived, Escalate, Reopen |
Starting an Investigation
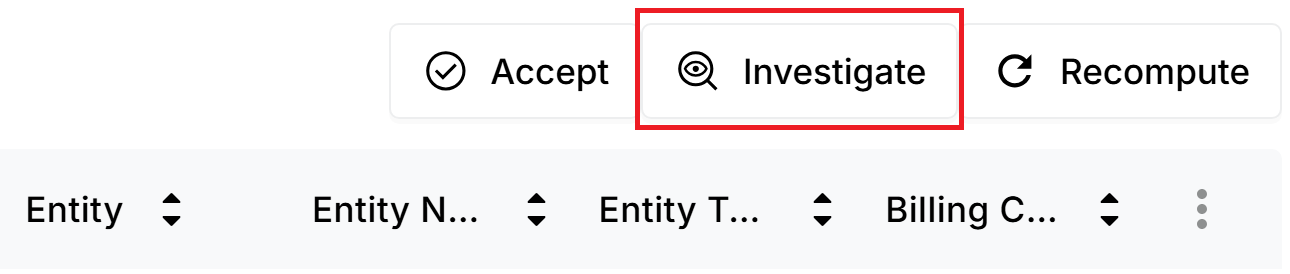
To start an investigation, you can update a fee from the New status to the Investigate status.
-
Identify a line item entry with the New Status in the Services or Events view.
-
Select the line item entry.
-
Click Investigate.
-
Observe the fee in the Investigating status under the Status column.
-
Select an investigate action. This is either:
-
Escalate
-
Flag as Suspicious
-
Flag as Optional
-
Flag as Penalty
-
Escalating to the Card Scheme
If required, you can escalate a fee in the Investigating status, and prepare an email to the Card Scheme.
-
Select a line item entry for a fee in the Investigating status.
-
Click Escalate.
The line item shows the Escalate status with the email icon.
- Click the email icon. An email template similar to the following appears.
-
To copy the email to a clipboard, click the
 button. You can then paste the text in to an email client.
 -
If you have escalated a fee in error, filter the records by status by selecting Escalated from the Status:All drop down list.
-
From the invoice line item, click Reopen.
Flagging as Suspicious
You can flag an invoice fee item in the status of Investigating as Suspicious.
-
Select a line item entry for a fee in the Investigating status.
-
Click Flag as Suspicious.
-
To escalate a suspicious item:
-
Filter the records by selecting Suspicious from the Status:All drop down list. For more details, see Filtering Invoice Items.
-
Select a line item entry.
-
Click Escalate.
-
-
If you have flagged a fee as suspicious in error:
-
Filter the records by status by selecting Suspicious from the Status:All drop down list. For more details, see Filtering Invoice Items.
-
Click Accept.
-
Flagging as Optional
You can flag an invoice fee item in the status of Investigating as Optional.
-
Select a line item entry for a fee in the Investigating status.
-
Click Flag as Optional.

-
To escalate an optional item:
-
Filter the records by selecting Optional from the Status:All drop down list. For more details, see Filtering Invoice Items.
-
Select a line item entry that is in the Optional status.
-
Click Escalate.
-
-
If you have flagged a fee as optional in error:
-
Filter the records by selecting Optional from the Status:All drop down list. For more details, see Filtering Invoice Items.
-
Click Accept.
-
Flagging as Penalty
You can flag an invoice fee item in the status of Investigating as a Penalty.
-
Select a line item entry for a fee in the Investigatingstatus.
-
Click Flag as Penalty.

-
Filter the records by selecting Penalty from the Status:All drop down list. For more details, see Filtering Invoice Items.
-
To request a waiver on the penalty:
-
Select the line item entry.
-
Click Request Waiver.
-
-
To escalate a penalty item:
-
Filter the records by selecting Penalty or Request Waiver from the Status:All drop down list. For more details, see Filtering Invoice Items.
-
From the invoice line item, click the three-dots
 button on the right-hand side of the table, and select the Escalate status.
-
-
To remove a waiver request:
-
Select a line item entry with the status of Request Waiver.
-
Click Waived. The status changes to Waived.
-
If you have flagged a fee as a penalty in error:
- Filter the records by selecting Penalty from the Status:All drop down list. For more details, see Filtering Invoice Items.
- Click Reopen. The status changes to Reopen.
Portioning Fees to a Program Manager (BIN Sponsors Only)
If you are a BIN Sponsor, you can portion fees between your organisation and the card program (or affiliate). This allows you to share accountability for the invoiced fees.
You can portion a fee in any status, such as the New or the Investigating status.
- Select a line item entry.
-
From the invoice line item, click the three-dots
button on the right-hand side of table, and select the Portion option. - In the displayed window, enter a value to represent a percentage in the My Portion field.
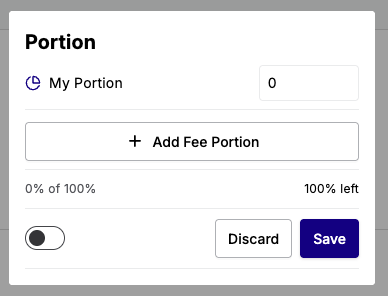
- Click Add Fee Portion.
- Choose an affiliate from the Select an affiliate list.
- Enter a value of the amount to portion in the adjacent field.
- Click Save.
Recomputing Fees
For fees that are in any status, you can perform the Recompute function the next time you upload an invoice. The Recompute function recalculates the fees, making it useful in scenarios such as missing fees.
- Ensure that you have identified a fee from the data boxes, search filters, and drill-down options.
- Upload a new invoice. For more details, see Uploading your Data.
- Identify the invoice line item from Fee Explorer. For more details, see Drilling Down to the Invoice Details.
- Click Recompute.