25 Using the Merchant Simulator
The Merchant Simulator menu on the Apata Portal Dashboard enables you to run simulated 3D Secure transactions. You can use simulated transactions to test the outcome of your cardholder authentication rules when applied to different types of card usage scenarios.
This option will only be visible if enabled for your organisation. For details, please check with your 3D Secure project manager.
25.1 Running a Simulated Transaction
-
To run a simulated transaction, select Merchant Simulator from the left-hand menu.
-
Enter the details of the 3D Secure transaction you want to simulate. See Transaction Simulation Fields.
-
Scroll down to the bottom of the page and click Submit Test Transaction.

Figure 41: Merchant Simulator screen
25.1.1 Transaction Simulation Fields
Refer to the table below for details of transaction simulation fields.
|
Field |
Description |
|---|---|
|
Test Cards |
Ignore this field. it is not relevant to Thredd programmes. |
|
PAN |
Enter the full Primary Account Number (PAN) of the card you want to test. |
|
Merchant |
Enter details of the merchant requesting cardholder authentication: Merchant name, Merchant ID and Merchant Country. |
|
Amount |
Enter the Amount and Currency of the transaction. |
|
Protocol Version |
Select the 3D Secure protocol version (e.g., 2.1.0 or 2.2.0). For more information, see Support for 3D Secure Versions. |
|
Challenge Preference |
Select the required challenge method from the drop-down:
|
|
Device |
Select the device type used for the 3D secure session. Options are: Browser or App. |
|
Alias |
Provide a name for your test transaction. |

25.1.2 Viewing Simulated Transactions
You can use the Transactions menu to search for your simulated transactions.
This option will only be visible if enabled for your organisation. For details, please check with your 3D Secure project manager.
-
To view simulated transactions, click the Transaction Simulation toggle button (at the top-right of the Transactions page).
![]()
Figure 42: Merchant Simulator toggle button
25.2 Backtesting Risk Profiles
Backtesting enables you to simulate how an updated version of a draft risk profile performs by running transactions on historical data. The backtest generates various insights on the draft risk profile, such as challenge and fraud rates, which help you to assess and decide on your next action. For example, you can edit the risk profile and run the backtest again if the challenge and fraud rates are too high. For further analysis, you can also export the backtested transactions to a CSV file.
For details on creating a draft risk profile, refer to Creating Draft Risk Profiles
25.2.1 Running a Backtest
- From the risk profile that you want to backtest, click Backtest.
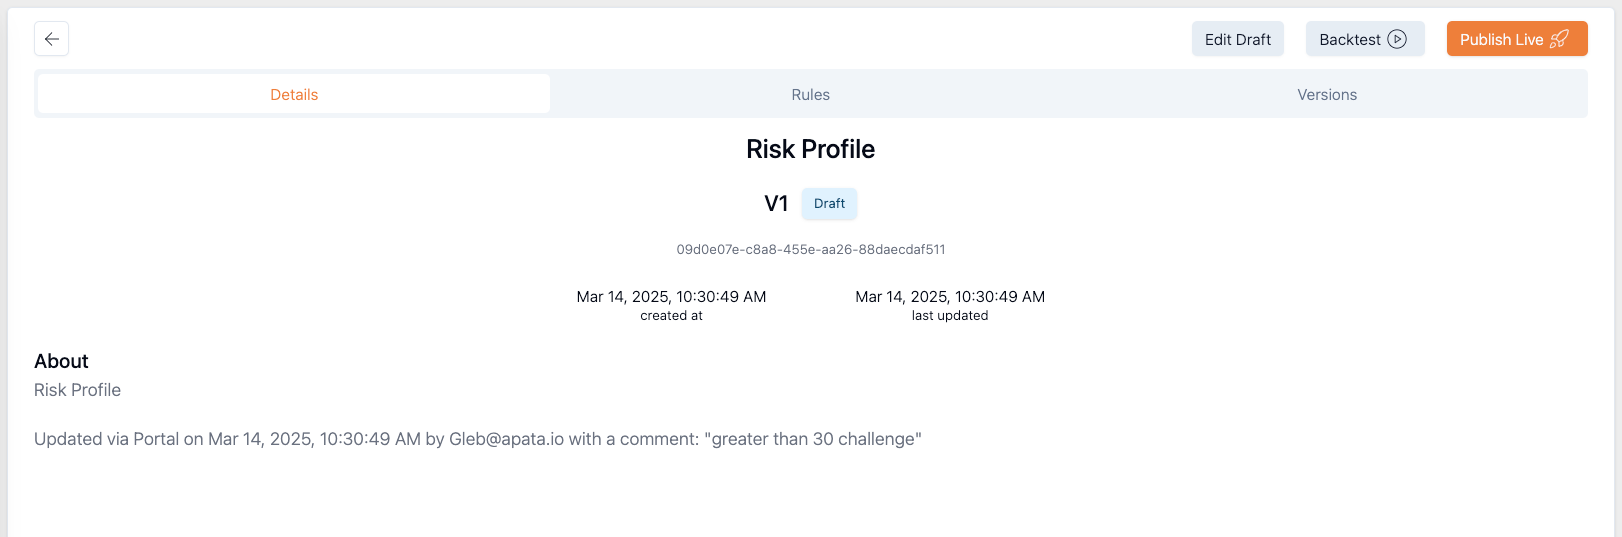
Figure 43: Backtest button
- In the displayed window, select the option to run a backtest against all transactions using the same risk profile.

Figure 44: Options for running a backtest
- Select a time range for the backtest in the Date selector.
- Enter a name for the backtest in the Backtest name field.
- Click Run. The backtest job starts to run. The job appears as an entry on the Backtesting page and, when finished, shows as COMPLETE in the Status column.

Figure 45: Backtest result as Complete
A backtest may take some time to complete which, depending on the volumes of evaluated transactions, can range from a few minutes to an hour.
You cannot run a backtest on a draft profile if the profile is older than three months.
25.2.2 Viewing Insights from the Backtest
- Click the
 button.
The backtest shows insights that consist of overall results and a breakdown by metrics. The insights compare historical transactions prior to running the test, as well as projected rates after the draft rules are applied to the historical transactions. The following is an explanation of the different rates.
|
Rate Category |
Description |
|---|---|
|
Frictionless |
The rate in which transactions are processed without 3D-Secure challenges (or requests for further authentication). |
|
Challenge |
The rate in which transactions are processed with 3D-Secure challenges, where there is a request for further authentication. |
|
Reject |
The rate in which transactions were declined during the 3D-Secure process. |
|
Fraud |
Apata categorises reported fraud based on the transaction outcome as follows:
|
You can view pie charts of the overall rates, and click on the image to see the data in bar chart format.
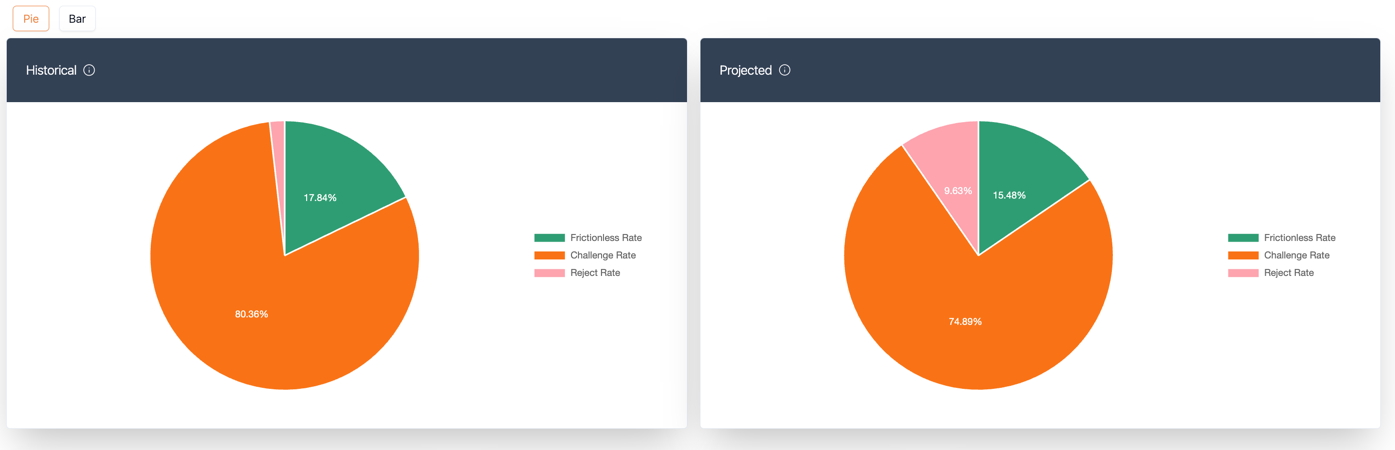
Figure 46: KPIs represented as pie charts
Summary boxes show metrics where there is a breakdown of changes to individual rates. In the example below, the reject rate increased by 7.83% from 1.8% to 9.63%. This resulted in an increase from 39,258 historically rejected transactions to 209,623.
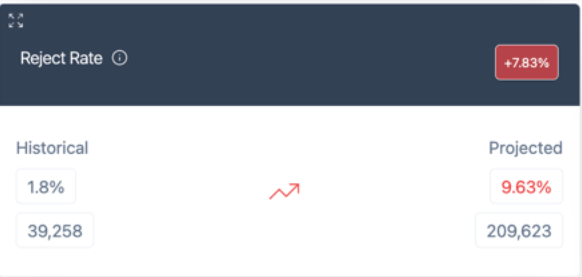
Figure 47: Boxes for breakdown by metrics
There are also metrics for individual risk rules within a profile in the above categories. A change in a risk rule may trigger a change in various rates.
There are these additional rates in the metrics for individual rules.
- Continue Rate, which is the number and rate of transactions that resulted in a "next" action by the rule, historically and during the backtest.
- Evaluated Rate, which is the total number of transactions evaluated by the rule, historically and during the backtest, along with the respective rates.
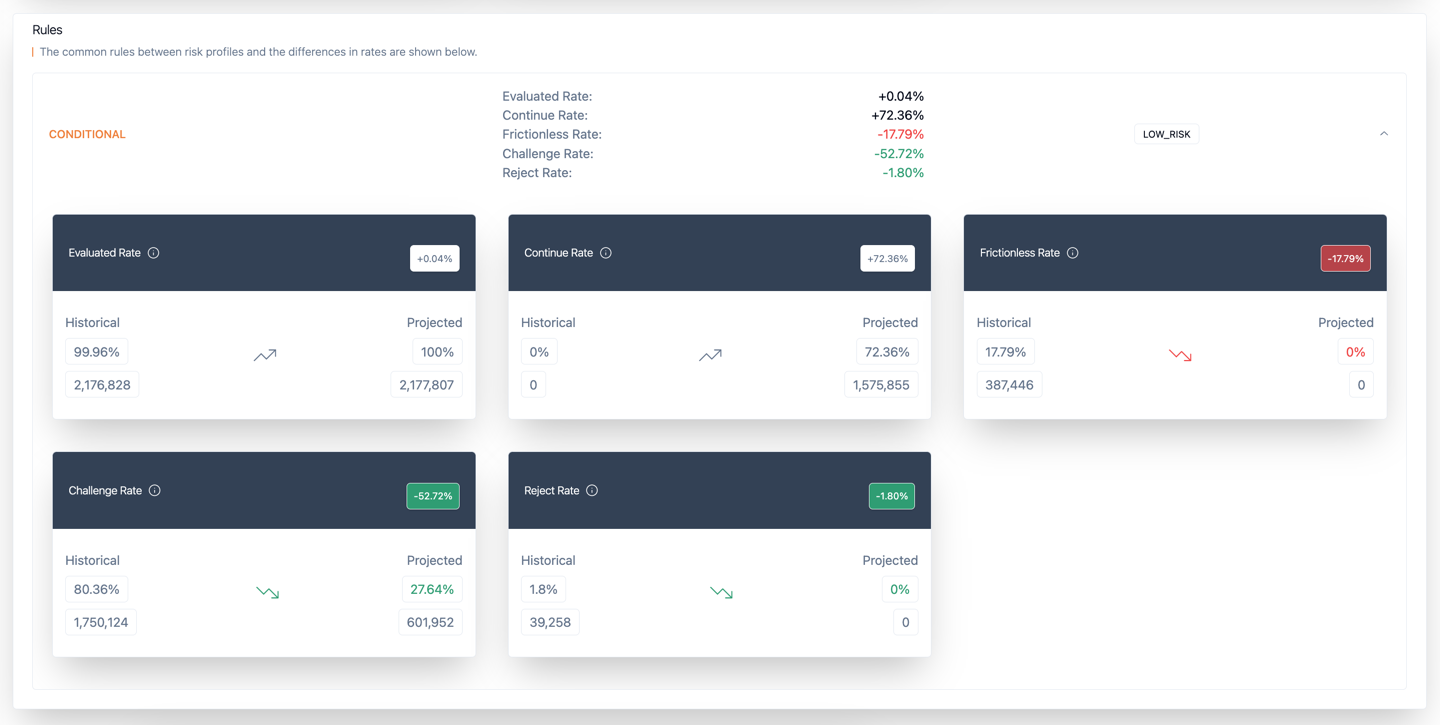
Figure 48: Metrics on individual rules
25.2.3 Exporting Backtest Transactions
The Export Transactions options allows you to export all the results to a .CSV file.
- Click Export Transactions located in the top-right corner of the page. The .CSV file includes details of the transaction, as well as fields containing the following additional data.
|
Additional Field |
Description |
|---|---|
|
action_historical |
The action taken for this transaction historically, either challenged, accepted, or rejected. |
|
action_projected |
The action that would have been taken, either challenged, accepted, or rejected. |
|
reason_historical |
For a transaction that was rejected historically, this field indicates the reason. |
|
reason_projected |
For a transaction that was rejected during the backtest, this field indicates the reason. |
|
exemption_historical |
For a transaction that was accepted historically, this field specifies the exemption applied. |
|
exemption_projected |
For a transaction that was accepted during the backtest, this field specifies the exemption applied. |
|
termRuleId_historical |
The ID of the risk rule that produced the original outcome. |
|
termRuleId_projected |
The ID of the risk rule that would produce the outcome under the backtest scenario. |
|
fraudType_historical |
Indicates the fraud classification for the transaction historically as Confirmed Fraud, Apata Prevented Fraud, or Apata Challenged Fraud. |
|
fraudType_projected |
Indicates the projected fraud classification for the transaction during the backtest as Confirmed Fraud, Apata Prevented Fraud, or Apata Challenged Fraud. |
If you have any queries, contact the Thredd 3DSecure team for assistance.